Plant Care Expert Guides
How to Grow Your Own Sweet Potato Slips
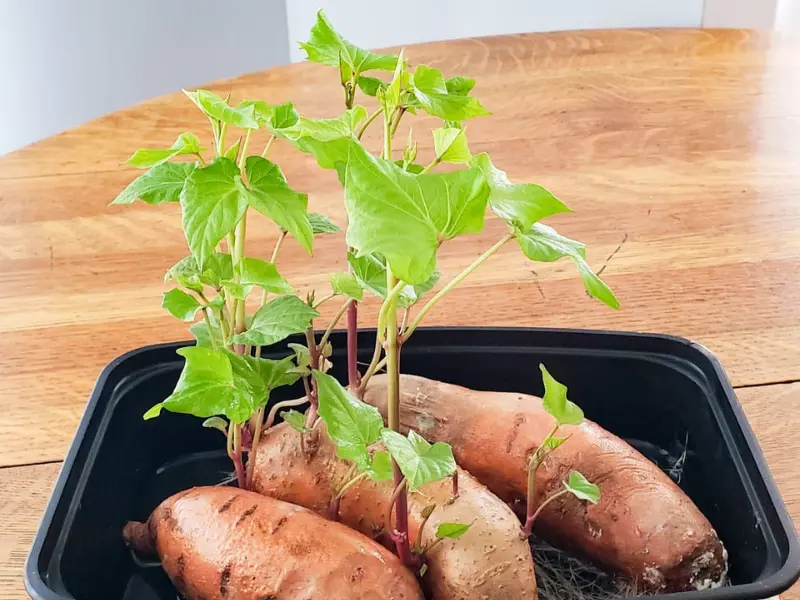
Growing sweet potatoes can be an incredibly rewarding experience, and it all starts with the humble sweet potato slips. Unlike white potatoes, which can be planted whole, sweet potatoes require a different approach. If you plant a whole sweet potato in the ground too early, the cold weather will stunt its growth and may even cause it to rot. That’s why the best method is to plant “slips”—the rooted sprouts that grow out of the sweet potato tuber—after the last frost date. Not only is this a fun way to get your garden started, but it also provides a great gardening activity for kids!
What You’ll Need
- Organic sweet potatoes (if possible) – either store-bought or seed potatoes from a reputable seed company.
- A strong knife to cut each tuber in half.
- A cutting board or piece of wood (I’ve used a section of 2×4 that just happened to be in our greenhouse!).
- Aluminum baking trays with a cover (I buy mine in the baking section of the grocery store).
- Organic seed starter mix that you have moistened in advance, enough to fill the tray and cover the potatoes.
For the past 10 years, I’ve been using these methods to grow my sweet potato slips. We mainly grow Japanese sweet potatoes because we love their slightly less sweet flavor and dry texture, but any variety will work just fine.
Starting the Process
Step 1: Fill a tray with the moistened organic seed starter mix. This will provide a good base for the sweet potatoes to begin sprouting.
Step 2: Slice each sweet potato lengthwise in half, placing the cut side down on the planting medium. Push the potato gently into the mixture, then cover it with a little more seed mix.
Step 3: Cover the tray with a plastic top, ensuring there is still some air circulation. The goal is to keep the environment warm and humid, which will encourage the potatoes to sprout.
Step 4: Place the tray under grow lights or fluorescent shop lights. You can also place it by a sunny window, but the grow lights will give you a more consistent result. Keep the soil moist, but not soggy.
If you want to speed up the process, you can place the tray on a heating mat for plants, though this is optional.
Watching the Sweet Potato Slips Grow

After 2-3 weeks, you’ll start seeing reddish sprouts emerging from the sides and tops of the potatoes. This is when you can remove the plastic cover, but continue to keep the tray moist. Soon, those stiff sprouts will start to leaf out and grow roots, which will be attached to the seed potato.
As the sprouts grow, they will develop roots underneath the sliced potato. When there are several green leaves and roots attached to each sprout, they’re ready to be “slipped” off the tuber. I prefer to cut the potato between the sprouts, so each sprout comes with a small piece of potato attached—this helps prevent breakage, which can sometimes happen if you pull the slips off too harshly.
Planting Sweet Potato Slips
Once the slips are ready, and if the last frost has passed, you can plant them directly in the garden. If not, you can pot them and keep them indoors under grow lights until the frost danger has passed.
I personally like to grow my slips in small pots for about two weeks, even if the last frost date has passed. This gives the slips time to develop stronger roots and larger leaves, which helps them thrive when planted outside. While this step requires a little more time and effort, it’s well worth it. In all the years I’ve been doing this, I’ve never lost a single plant in the row!
How Many Slips Do You Need?
Each sweet potato tuber typically yields at least 6 healthy slips, sometimes more. You can expect each slip to grow into a plant that will produce around 6 sweet potatoes on average. To make sure you have enough for your harvest, a little math is helpful:
Let’s say you want to have 104 potatoes for the year (2 per week for 52 weeks). Since each plant produces about 6 potatoes, you’ll need 18 plants. That means you’ll need 18 slips, which, if each tuber yields 6 slips, will require about 3 seed potatoes.
Preparing the Garden Space
Sweet potato plants have long vines that can spread up to 4 feet in every direction. To give them enough room to grow, I plant them about 1 foot apart in the garden, so I need an 18-foot row or a few smaller rows to fit them all in.
When planting, I like to mark the spot for each plant with a stake. This helps me know exactly where to water, especially when the vines start to spread out. It also makes it easier to identify each plant later in the fall when it’s time to harvest.
Caring for the Slips
As the plants grow, their vines will spread out and cover the soil, so it’s important to plan for their spreading nature. If you want to keep squirrels away from your harvest, you can cover the row with black landscape fabric. It lets in water but keeps out the critters and prevents weeds from growing between the vines.
Harvesting Your Sweet Potatoes

By mid-October (or definitely before the first frost), your sweet potatoes will be ready to harvest. To do this, follow these steps:
- Start by cutting away the vines about a foot from each plant using garden shears. Pull the vines to the sides to clear the area around the plants.
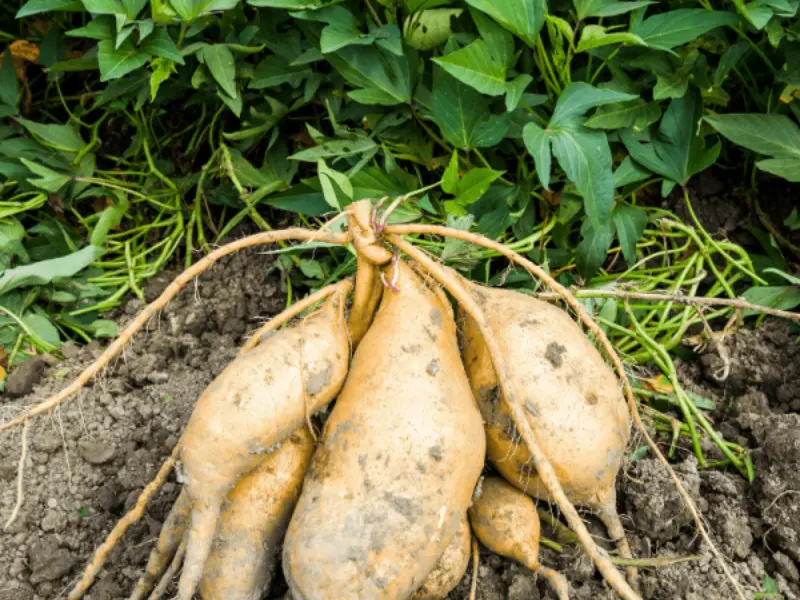
- Gently dig around the plant using a trowel. Be careful not to cut into the potatoes. As you pull on the stalks, the sweet potatoes will come out of the ground, often all at once.
- To harden the skins, leave the potatoes in the row for a few hours to dry. Then, gently rub off any remaining soil using your hands or a soft cloth.
Curing the Potatoes
To ensure your potatoes store well, they need to be properly cured. Sweet potatoes should be cured in a warm environment (75°F to 80°F) for about 10 days. After curing, they can be stored in a cool room (60°F to 65°F) for the winter.
And that’s it! Now you can enjoy your homegrown sweet potatoes all year long!
Helpful Resources:

